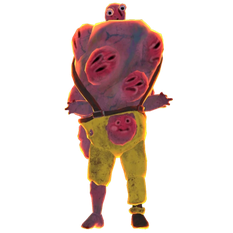
Monsters
There are a lot of monsters that can spawn in the different locations. Most monsters attack you or the items you collect, while others hinder you. They all have different methods of operation.
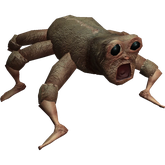
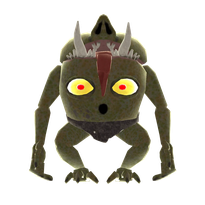
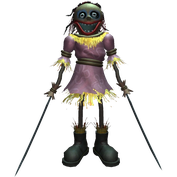
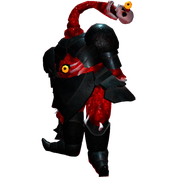
List
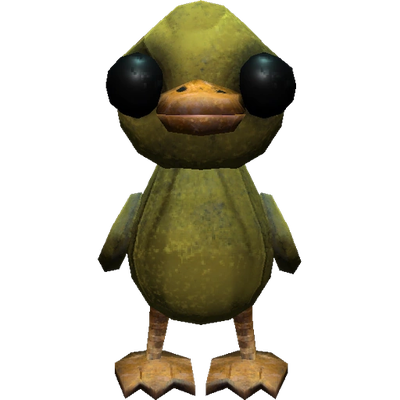
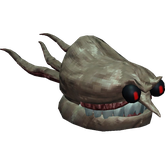
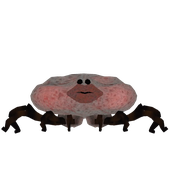
| NAME | APPERANCE | LEVEL | HEALTH | DAMAGE | DETECTION |
ORB$ |
|
|
|
|
1 | 150 | - 10 |
In sight Sound |
$2k ~ $3k | |

|
1 | 20 | - 10 |
In sight Sound |
$0k (no orb drop) |
||
|
|

|
1 | 30 | - 2/sec |
In sight |
$2k ~ $3k |
|
|
|

|
1 | 150 | - 30 |
In sight |
$2k ~ $3k |
|
|
|
|
1 | 65 | - 10 |
In sight |
$2k ~ $3k |
|

|
1 | 150 | - 10/s |
Balloon burst |
$2k ~ $3k |
||

|
1 | 600 | - 5 |
In sight |
$2k ~ $3k |
||
|
1 | 200 | - 5 |
In sight Proximity awarness |
$2k ~ $3k |
||
|
1 | 10 | - 10/s |
By catching i |
$2k ~ $3k |
||
|
|
|
2 | 150 | - 2 |
In sight |
$3k ~ $4,5k |
|
|
|

|
2 | 50 | - random |
In sight |
$0k (no orb drop) |
|
|
|

|
2 | 100 | - 5 |
In sight |
$2k ~ $7k |
|
|
|

|
2 | 250 | - 10 |
In sight |
$3k ~ $4,5k |
|
|
|

|
2 | 100 | - random | In sight |
$3k ~ $7k |
|
|
|

|
2 | 150 | - 50 |
In sight Sound |
$3k ~ $4,5k |
|
|
|

|
2 | 150 |
- 19 ~ 225 (random) |
In sight Sound |
$3k ~ $4,5k |
|
|
|

|
2 | 50 | - 10 |
In sight Sound |
$3k ~ $4,5k | |
|
|

|
2 | 50 | - 10 |
In sight Sound |
$3k ~ $4,5k | |
|
|
|
2 | 50 | - 10 |
In sight Sound |
$3k ~ $4,5k | |
|
|

|
2 | 50 | - 10 |
In sight Sound |
$3k ~ $4,5k | |
|
|

|
2 | 50 | - 10 |
In sight Sound |
$3k ~ $4,5k | |
|
|

|
3 | 250 |
Beam : - 30+70 Kick : - 10+50 |
In sight Proximity awarness |
$5k ~ $8k | |
|
|

|
3 | 250 |
- 50 |
In sight |
$4k ~ $8k | |
|
|

|
3 | 250 |
- 100 |
Sound Physical contact |
$3k ~ $7k | |
|
|
|
3 | 250 |
- 10/s |
In sight |
$6k ~ $8k | |
|
|

|
3 | 250 |
Standing :
- 100 - 50 |
In sight Direct eye contact |
$5k ~ $8k | |
|
|
|
3 | 500 |
Slam :
- One shot
- 100 (20+80) - 50 |
In sight |
$5k ~ $8k | |
|
|
|
3 | 350 |
Explosion : - 75 ~ 90 Melee : - 40 Radiation : - 5/s |
In sight Sound |
??? |
|
|
|

|
3 | 500 | .. | ... |
??? |
Monster Behavior and Detection
Monsters in the game are hostile by nature — their main goal is to stop you from completing your objectives. They’ll go out of their way to hinder your progress by attacking players or destroying valuable items. Each monster has its own unique traits : different attack patterns, detection methods, and behaviors that make every encounter feel distinct.
Roaming Patterns :
Most monsters patrol the map using loosely defined paths, wandering through rooms and hallways. However, some exceptions exist — such as the Shadow Child and Peeper, who don’t follow paths at all and instead teleport randomly, appearing unexpectedly in various
locations.
While many monsters will react to sound and move toward it to investigate, they don’t usually attack based on noise alone. Line of sight is the main trigger for entering an aggressive state, with
one major exception : The Huntsman. He relies almost entirely on sound to track players and can become hostile purely by hearing you.
Detection Systems :
Monsters can detect players through multiple methods — most notably vision, sound, and proximity. Here's how each works
Line of Sight :
Most creatures use vision to detect players, and each has a different cone of vision based on size and posture. For example, shorter monsters or those like the Trudge may spot players more easily while they hide, since their visual perspective allows them to see under furniture. Monsters are also able to see carried items — if they spot what you’re holding, they’ll give chase. Hiding and crouching can significantly alter your visibility :
- Standing : Large vision cone; detection happens within 1 second.
- Crouching : Medium vision cone; detection occurs after 2.5 seconds.
- Hiding under objects : Very limited cone of vision; detection takes about 5 seconds.
Additionally, even minor obstructions like chair legs or small furniture can break line of sight, helping players avoid pursuit.
Sound-Based Detection :
Sound plays a crucial role in monster behavior. Nearly all monsters respond to noise by investigating its source — though the range and accuracy vary. Crouching makes no noise, walking makes a little, and sprinting makes a lot. Landing from a jump or fall creates a loud impact, often drawing monsters to your location. Breakable valuables and special interactions can also produce loud sounds. Some details :
- After the final extraction starts, the escape truck emits silent “ping” signals that attract monsters to it.
- Players also emit silent pings to nearby level points during this phase, explaining why monsters tend to linger around them.
- For scale : walking sounds travel about the size of a stone tile in Swiftbroom Academy, while sprinting is heard across the width of a full hallway.
The Huntsman has enhanced hearing — his detection range is 5× greater than other monsters. If a sound is normally heard from 5 tiles away, he’ll hear it from 25. He also cannot tell the difference between player-made and monster-made sounds, and will attack regardless.
Proximity Awareness :
Some monsters react when players are physically close, even if they haven’t seen or heard them. This is known as proximity awareness. Crouching helps reduce your presence and lowers the chance of being detected this way.
Monster Spawning System
Monsters are divided into three tiers (Level 1, 2, and 3), and each map uses a mix of them based on the current world level. All monsters of the same tier share the same spawn probability within
their category.
When a new map loads, the game selects a fixed group of monsters based on the map level. If a monster roams too long without encountering a player, it will eventually despawn and later respawn
elsewhere.
Spawn Distribution by World Level :
| MAP LEVEL | LV1 MONSTER(S) | LV2 MONSTER(S) | LV3 MONSTER(S) |
| 1 - 2 | 1 | 0 | 1 |
| 3 - 5 | 1 | 1 | 1 |
| 6 - 8 | 2 | 2 | 2 |
| 9 - 10 | 2 | 3 | 2 |
| 11 + | 2 | 3 | 3 |
Additionally, 4.6656% of the time, a Level 3 monster may be replaced by a random group of smaller enemies from the list below :
- 3x Animal
- 4x Apex Predator
- 6x Banger
- 3x Bowtie
- 3x Chef
- 10x Gnome
- 2x Hidden
- 3x Mentalist
- 3x Peeper
- 3x Rugrat
- 4x Shadow Child
- 4x Spewer
- 3x Upscream
Initial Spawn Behavior :
At the start of a round, monsters spawn as far from the truck as possible and remain idle for a short duration. The idle time is determined by the current map level. In rare cases, a bug may cause a monster to spawn near the closest player instead, often near the truck. Idle monsters become active if :
-
A player comes within 20 units
-
Another monster attacks an object or player nearby
Despawning & Respawning Mechanics :
After spawning, each monster has a grace period of about 4–5 minutes during which it cannot despawn. Once that time ends, a despawn timer (lasting 20 to 40 seconds) begins. If the monster moves more than 20 units away from all players when this timer hits zero, it disappears.
-
If a player is within 20 units, the despawn timer freezes — but it does not reset.
-
That means a monster may vanish instantly when it moves just outside of the 20-unit radius if the timer was already near zero.
Once despawned, the respawn timer starts, and its duration depends on how long the round has been running :
| ELAPSED TIME | RESPAWN TIME |
| 0 - 10 minutes | 4 - 5 minutes |
| 10 - 20 minutes | 3,2 - 4 minutes |
| 20 - 30 minutes | 2,4 - 3 minutes |
| 30 - 40 minutes | 1,6 - 2 minutes |
| 40 - 50 minutes | 0,8 - 1 minutes |
| 50 + minute / final phase | 1 second |
Killing a monster will triple its respawn time.
Example : If a monster is killed in the first 10 minutes, it will take 12–15 minutes to come back instead of the usual 4–5.
Note : Swarm-based monsters like Gnome and Banger seem immune to this
penalty.
Noise & Respawn AcceleratioN :
Loud sounds can accelerate monster respawns by reducing the remaining timer. Each uniquely loud item shortens the timer by 5 seconds. These include :
-
Animal Crate
-
Guitar
-
Piano
-
Harp
-
Player-made noise (gunfire, explosions)
Items that produce continuous sound — like the Television, Ice Saw, or Gramophone — reduce the respawn timer by 5 seconds per second of noise output. When such noise takes effect, a brief static glitch may flash across the players’ screens as feedback.
Damaging and Eliminating Monsters
Every monster can be defeated — though some are far more durable than others. Upon death, most monsters drop an Enemy Valuable (also called an orb), a collectible representing their soul. The only known exceptions are Gnome and Banger, which do not drop orbs.
Health and Damage Sources :
Monsters vary greatly in durability. At the low end, Gnomes have just 20 HP and can be eliminated with a well-aimed throw. On the opposite end, the Trudge boasts a hefty 500 HP. Damage can come from several sources, not just weapons bought from the store. Environmental hazards like pits, explosions, fall damage, trap mechanisms (e.g., lasers, cauldrons), or even friendly fire from other monsters are all effective means of elimination.
Instant Kills via Pits :
The most efficient way to kill most enemies is by dropping them into pits — an instant kill for most monsters. When this happens, their orb will float out of the pit and be protected for five seconds before becoming vulnerable again. To pull this off, you’ll need enough strength to lift the monster. Stunning them first will significantly reduce their weight, allowing even a solo player to carry them. Alternatively, co-op lifting with other players makes the task easier.
Some monsters, like the Chef, can be baited into charging off ledges. Others can be pushed using items with knockback effects. Be cautious with flying monsters like the Apex Predator or Headsman—they must be stunned or repeatedly knocked back into the pit, or they'll simply fly out unharmed.
Warning : The Huntsman :
The Huntsman presents a special challenge. Blind but extremely dangerous, he relies exclusively on sound. Interestingly, he trips on stairs, taking minor damage and becoming temporarily stunned. You can exploit this by baiting him to go up and down staircases repeatedly. If you’re quick enough, you can also slam him into the ground during his stunned state for extra damage. Better yet, if stairs lead near a pit, bait him to fall and then toss him in before he recovers.
Some map layouts—like those in the Headman Manor—can even cause him to trip repeatedly on their own, sometimes resulting in him dying without any player intervention.
Physics Damage and Valuables as Weapons :
Valuables aren't just for selling — they can be weapons too. Depending on the object’s size and momentum, hitting a monster with one can deal up to 120 damage. However, to deal real damage (and not just a light tap), the item must carry some velocity. Properly thrown valuables can stun monsters, making them easier to kill or reposition. For large monsters, a good tactic is to stun them and then keep the valuable between you and the monster, using it to gain momentum for repeat hits while staying hidden.
If you're trying to preserve the item's value, use lighter hits rather than high-speed throws. Also, avoid attacking during the monster's stun period — wait for them to get up before hitting again.
For a list of items that can stun monsters effectively, refer to the Items page.
Using Monsters Against Each Other :
Another clever strategy is to turn monsters against one another :
-
The Clown's laser can be baited to fire at other enemies if you time your movements well.
-
The Huntsman reacts to any sound — even that of other monsters — and may attack them if they make noise or stand between him and a player he hears.
-
Banger though unable to drop orbs, can still be used as living grenades thanks to their explosive deaths.
-
Spewer can also deal damage to enemies through their vomit — which doesn’t alert monsters — but using them is risky, as close proximity can still result in detection.
Enemy Valuables (Orbs) :
When a monster dies, it may drop an Enemy Valuable orb — a glowing object representing its essence. These orbs go through a short invulnerable state (white shell) lasting 5 seconds, after which they become fragile (pink/purple). Orbs vary in size and value depending on the monster's level :
-
Level 1 = Small orb
-
Level 2 = Medium orb
-
Level 3 = Large orb
There are a few important rules about orbs :
-
A maximum of 10 orbs can exist on the map at once. If more are created, the oldest will explode.
-
Each monster can drop a maximum of 3 orbs per session. After that, it will no longer produce orbs, even if it respawns.
-
This orb limit is per monster instance. For example, if there are 2 Chef, each can drop 3 orbs, giving a total of 6.
Tips & Strategies
There are many tips and strategies you can adopt to become better at R.E.P.O. !
On Enemy Valuables (Orbs) :
- If a monster you've killed (and haven't killed more than twice) doesn’t drop an orb, it likely died earlier elsewhere on the map—most commonly from falling into a pit. The orb may still exist, but it could have already broken or despawned, making it generally not worth searching for.
Final Extraction Strategy :
-
Rush to the truck as soon as the final extraction is completed. After this phase, monsters spawn more frequently and players emit silent “ping” signals that attract them.
-
On maps with three extraction points, it’s wise to leave the one nearest to the truck for last, minimizing travel distance during the final sprint.
-
The endgame monster pressure only begins once the extraction process officially completes and players are instructed to return. You can prepare in advance by placing valuables on the final extraction point without triggering it, allowing for a fast deposit and quick escape once it activates.
Using Valuables as Weapons :
When deciding whether to sacrifice a valuable to eliminate a monster, think in terms of value trade-offs :
-
If you’re confident in your ability to defeat a monster without dying and not lose the resulting orb, using a low-value item to kill a monster can be a profitable strategy.
-
For example, Spewer have only 65 HP and can be taken out easily with a $600 valuable, resulting in an orb worth at least $2,000 — a clear profit of $1,400 or more.
-
Similarly, a Clown’s explosion (triggered by pressing its nose three times) deals 300 damage, killing anything except a Trudge. Even though a Clown costs around $3,000, using it to kill a large monster (orb value : $5,000+) can still net a $2,000 profit.
- In the early levels, when you don't have enough strength upgrades to easily lift and kill monsters, you can use your C.A.R.T. to ram into them, knocking them back and dealing damage.
Maximizing Damage with Durable Tools :
Some valuables deal direct damage without being destroyed, offering a great way to eliminate enemies while preserving your tools :
-
Items like the Ice Saw or Blender cause continuous damage and are especially useful when made indestructible using Indestructible Drones.
-
Note : Indestructible Drones only prevent damage from physical impact, not from continuous or environmental damage. This means tools that deal non-impact damage can become highly effective, reusable weapons when paired with these drones.
-
Another efficient technique is to damage volatile items, like propane tanks, just enough to start leaking without causing an explosion — allowing them to harm monsters while remaining usable.
Sources
*some of the information in the "Monster Spawning System" section comes from the following sources:
- R.E.P.O. Wiki - Monster page
- How Monsters Spawn in R.E.P.O. - Bread on YouTube
- Redit r/REPOgame - Any idea how the monster spawns work?
*some of the information in the "Damaging and Eliminating Monsters" section comes from the following sources:
- R.E.P.O. Wiki - Monster page
- ExitLag - How to Kill Monsters in REPO: Ultimate Combat Guide
- GameRadar+ - All REPO monsters and how to beat them
*please note that the other parts of this page & the monster pages were created using our knowledge of the game — even though the structure may be similar to that of other websites.
Use of content
*some external sources have used our content to write their blogs, wikis, and guides:
- Steam Guide - "Complete guide to the NEW monsters of R.E.P.O. !"
Navigate in ![]() category
category